 Classroom Crafts
by The Teachers.Net Community
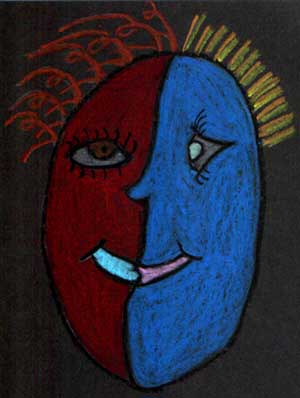
Picasso Faces

Project: Portraits using abstract art in the style of Picasso's painting, The Girl Before the Mirror.
Objective: Abstract art
Definition: Art that departs significantly from natural appearances. Forms are modified or changed to varying degrees in order to emphasize certain qualities or content. Recognizable references to original appearances may be slight. Artforms 5th edition, Duane and Sarah Preble
Medium: Oil Pastels
Materials:
- 8 1/2 by 11 inch sheet of black construction paper
- Oil Pastels
- White crayon
Background: Pablo Picasso (1881-1973) one of the greatest artists of our century used many different styles in his work. This lesson introduces his abstract work.
Internet web sites:
http://www.abcgallery.com/P/
picasso/picasso.html
http://www.abcgallery.com/P/
picasso/picassobio.html
http://www.moma.org/provenance/
items/2.38.html
Procedure: The students are shown Picasso's painting, The Girl Before the Mirror. The students are directed to the faces in the painting and to see how Picasso changed the faces from natural looking faces to abstract faces. The teacher then demonstrates the lesson by following these step by step instructions.
- Draw a circle for a face, using a white crayon.
- Draw a profile down the face.
- Draw the front view of an eye and a side view of an eye. You can place one eye in a different place.
- Draw the mouth.
- Make crazy hairstyles. Draw each hair.
- Outline every single line with a black pastel.
- Color all parts. Color each side a different color.
Barb Gilman
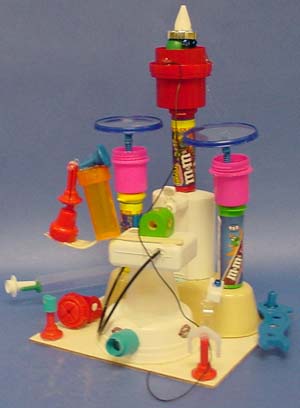
Junk Sculpture

Every year for Earth Day, I have my grade two students save their "garbage" and bring it to school. The directions are to bring in CLEAN, LIGHTWEIGHT items that would normally be thrown in the garbage. Then on Earth Day we use a hot glue gun and make a "Junk Sculpture." We talk about how we reuse and recycle things to help conserve our resources. The kids have made some wonderful sculptures.
Nancy Mead
Egg Swap Art
I have an egg shape on a piece of 8 1\2 by 11 paper. The egg is divided into 4 parts by 3 wavy lines going across. Each part is numbered 1, 2, 3, or 4, going down from the top (Just a small number, but in marker so the decorating doesn't cover it up). I have the kids decorate the egg with crayons, craypas, or colored chalk, any way they want. I encourage designs, not pictures, and in bright colors. When they are done, they cut the egg into 4 parts, on the wavy lines. They keep their own top piece (number 1). The others go into bags corresponding with the number....you need 3 bags in front of the room. They each pick a new part that someone else made from each bag. Then they glue the egg back together on another piece of paper, with their piece on the top, and each piece below coming from some one else. We cut these out and put them on a bulletin board for Easter.
I have also done this with one LARGE egg, dividing it into strips of paper, so each student gets one piece. They decorate their strip, and then I glue them back together, in order, onto another large piece of paper. This makes one big, colorful egg. (Be sure to number them though or you will have quite the puzzle to solve! And make sure they decorate the numbered side...backwards pieces just don't fit.)
Posted on the second grade mailring by Cindy
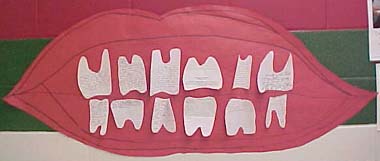
Tooth Writing/Craft Project

click the image for a larger view
During dental health month, we read about dental health in our health book. For an assessment I had the kids write a paragraph about "What I know about Healthy Teeth", "How to Have Healthy Teeth" or "Why it is Important to Have Healthy Teeth". I had them write a rough draft, then edit it and then do a final. For their final, the idea came to me to have them cut their paper in the shape of a tooth. Then a student suggested that we make a big mouth to put the teeth in. So while they were writing I got some red bulletin board paper and cut out huge lips and we put our "teeth" paragraphs in them and hung them in the hall. It is soooo cute! Just wanted to share.
Sherri McWhorter on the Third Grade Mailring
Student Made Flag

Supplies Needed:
- 1 white twin sized bed sheet
- red, white and blue washable paint
- a ruler
- masking tape
- a star shaped sponge
- "handful" of kindergarten students
Procedure:
- Launder and dry sheet before starting.
- Use masking tape to make a large rectangle in the upper left hand side of the sheet.
- Paint blue paint inside the rectangle outline. Dry throughly before going on to the next step.
- Using masking tape, make seven lines on the sheet, spacing them evenly apart.
- Just above each masking tape line, have the students make red handprints for the stripes.
- When the stripes are dry, dip a star shaped sponge in white paint to add the 50 stars!
Janet Bowland
Moss Foundation
The P. Buckley Moss Foundation for Children's Education recognizes outstanding teachers who use the arts as a cornerstone for their innovative and effective approaches to teaching students with identified perceptual, cognitive, and sensory disabilities. A "Grand Award" of $2,000 with a matching amount to the school or program is awarded to the teacher who best evidences integration of the arts into educational programming for children with learning disabilities and other special needs. Two Prize Awards of $1,000 with matching amounts to the programs will be awarded. Grants of up to $1,000 may be granted to teachers who wish to enhance new, established, or evolving programs to integrate the arts. Deadline for applications is May 15, 2002.
http://www.mossfoundation.org/id.cfm?ID=4
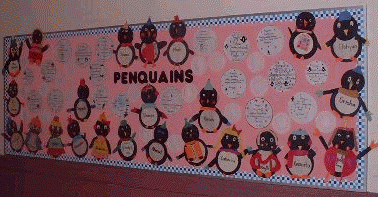
Penquains

Here is a winter bulletin board idea from my grade three class.
Students made cut and paste penguins from construction paper (traced lids for the circular heads and bodies). They then wrote cinquain poems about penguins which were then written on large paper snowballs. The penguins and cinquains were displayed on a bulletin board called PENQUAINS.
Michael Moore
Grade Three
Toronto, Ontario, Canada
|

